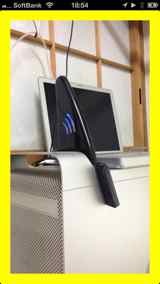
2013-07-20 [iOS]AR(カメラのライブプレビュー表示)
話題となっているAR(AugmentedReality)やビーコン(Beacon)について実験だ!
とりあえず、プロジェクトに、AVFoundation.frameworkとCoreMedia.framework、CoreVideo.frameworkを追加しておく。
プロジェクトのInfo.plistのRequired device capabilitiesに、still-cameraとauto-focus-camera、front-facing-camera、camera-flash、video-cameraを追加しておく。
ViewControllerにプレビューを表示するビューを用意する。
@interface ViewController : UIViewController

@property (weak, nonatomic) IBOutlet UIView *augmentedRealityView;

@end
デバイスモードの設定。フラッシュ(トーチ)を自動に設定。
    /* Set torch and flash mode to auto */
    if ([[self _backFacingCamera] hasFlash]) {
		if ([[self _backFacingCamera] lockForConfiguration:nil]) {
			if ([[self _backFacingCamera] isFlashModeSupported:AVCaptureFlashModeAuto]) {
				[[self _backFacingCamera] setFlashMode:AVCaptureFlashModeAuto];
			}
			[[self _backFacingCamera] unlockForConfiguration];
		}
	}
	if ([[self _backFacingCamera] hasTorch]) {
		if ([[self _backFacingCamera] lockForConfiguration:nil]) {
			if ([[self _backFacingCamera] isTorchModeSupported:AVCaptureTorchModeAuto]) {
				[[self _backFacingCamera] setTorchMode:AVCaptureTorchModeAuto];
			}
			[[self _backFacingCamera] unlockForConfiguration];
		}
	}
カメラデバイスの初期化。背面カメラを利用する事にした。
- (AVCaptureDevice *)_cameraWithPosition:(AVCaptureDevicePosition)position
{
    NSArray *devices = [AVCaptureDevice devicesWithMediaType:AVMediaTypeVideo];
    for (AVCaptureDevice *device in devices) {
        if ([device position] == position) {
            return device;
        }
    }
    return nil;
}

- (AVCaptureDevice *)_backFacingCamera
{
    return [self _cameraWithPosition:AVCaptureDevicePositionBack];
}

	:
    /* Init the device inputs */
    self.videoInput = [[AVCaptureDeviceInput alloc] initWithDevice:[self _backFacingCamera]
                                                             error:nil];
	:
動画取り込みのセッションを生成して、入力源として背面カメラを設定する。
    /* Create session (use default AVCaptureSessionPresetHigh) */
    self.capureSession = [[AVCaptureSession alloc] init];

    /* Add inputs and output to the capture session */
    if ([self.capureSession canAddInput:self.videoInput]) {
        [self.capureSession addInput:self.videoInput];
    }
ライブプレビューのレイヤーを生成して、それをプレビューを表示するビューに追加する。
    /* Create video preview layer and add it to the UI */
    self.captureVideoPreviewLayer = [[AVCaptureVideoPreviewLayer alloc] initWithSession:self.capureSession];
    CALayer *viewLayer = [self.augmentedRealityView layer];
    [viewLayer setMasksToBounds:YES];

    CGRect bounds = [self.augmentedRealityView bounds];
    [self.captureVideoPreviewLayer setFrame:bounds];

    if ([self.captureVideoPreviewLayer isOrientationSupported]) {
        [self.captureVideoPreviewLayer setOrientation:AVCaptureVideoOrientationPortrait];
    }

    [self.captureVideoPreviewLayer setVideoGravity:AVLayerVideoGravityResizeAspectFill];

    [viewLayer insertSublayer:self.captureVideoPreviewLayer below:[[viewLayer sublayers] objectAtIndex:0]];
動画取り込みを開始!
    dispatch_async(dispatch_get_global_queue(DISPATCH_QUEUE_PRIORITY_DEFAULT, 0), ^{
        [self.capureSession startRunning];
    });
上記のコードは、ViewControllerの-viewDidLoadに記述したのだが、表示されない!色々調べて分かったのだが、プレビューを表示するビューのサイズが0だ!Storyboardを使っているのだが何故だ!
なんとかして原因は分かった。古いOSをサポートする場合が多いため、StoryboardのAutolayoutを使ってこなかったのだが、Autolayoutを使う場合、-viewDidLoadが呼ばれたタイミングでは、サブ・ビューのサイズが決まっていないというのが理由のようだ。
-viewDidLayoutSubviews:というメソッドがあるので、そこでライブプレビューのレイヤのサイズを設定すればいい。
- (void)viewWillLayoutSubviews
{
    [super viewWillLayoutSubviews];

    CGRect bounds = [self.augmentedRealityView bounds];
    [self.captureVideoPreviewLayer setFrame:bounds];
}

_ ソースコード
GitHubからどうぞ。https://github.com/murakami/workbook/tree/master/ios/AugmentedReality - GitHub
_ 関連情報
Augmented Reality in iOS: Building Apps With Sensors and Computer VisioniOS Sensor Programming: iPhone and iPad Apps With Arduino, Augmented Reality, and Geolocation